photoblogography - Just some stuff about photography

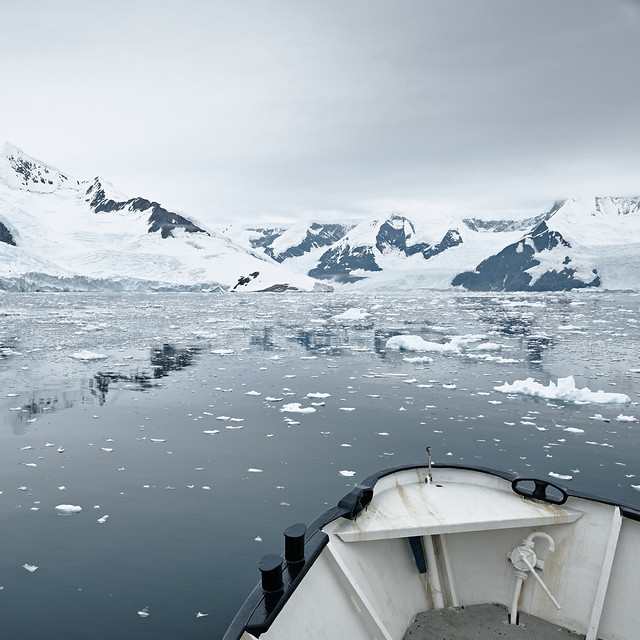
Going wide in Antarctica

a weird, but wonderful camera

in Sigma , Friday, February 19, 2021

I have written more than one post about my enthusiasm for the Sigma dp0 Quattro. Having just completed editing the series of photos I took with it in Antarctica little over a year ago, I felt like writing a bit more.

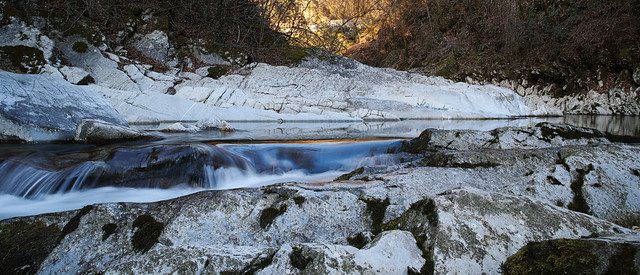
For me the dp0 plays the role of high quality digital panoramic camera, hence my describing it as the digital XPan, with a similar multi-aspect ratio, except in this case the “single frame” is actually has the same long-edge resolution as the panorama.

So, the dp0 panorama mode is a crop, but for me the fact that I get the crop (a rather unique 21:9) on screen means that I can compose in panoramic mode, rather that crop afterwards in post production, and that makes a big difference. It means I can set my creative brain to panoramic mode and not get distracted by elements outside of the composition. But it also means I can move the panoramic frame in post, which essentially gives me positive and negative shift control. Of course this is all artificial, and yes, to some extent you can do it with any camera, but there is a psychological aspect to this which makes me feel like I’m using a true panoramic camera and therefore helps me find appropriate compositions. It would be even better if Sigma introduced a firmware upgrade which allowed me to shift the frame up or down in-camera.

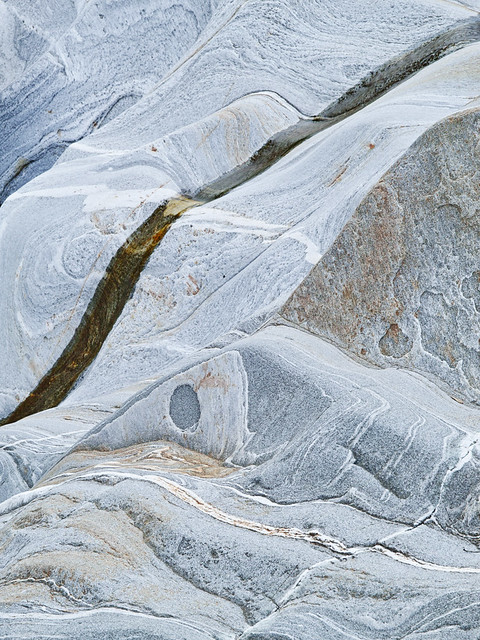
But apart from all the pseudo-panorama babble, what brings me back to the dp0 time and time again is the delicate colour and superfine detail that comes from the combination of the fixed 14mm lens and the Foveon sensor. I don’t really mean detail in the pixel-peeping sense: sure you zoom in to 100% and see amazing resolution. In fact you can go beyond, almost to 300% before things start to break down, but to my eyes there is something about the detail at any zoom level. It looks quite different to other digital cameras, even medium format.

The other thing about the dp0 is how light it is, especially given what it delivers. The unique shape makes it a little cumbersome to pack, not to mention a reliable attention grabber on the street, but generally it is very easy to carry around, and once you get used to its different way of doing things, quite a pleasure to use.

All of this adds up to a camera which very easily justifies its space in the very limited luggage one can carry to Antarctica, especially when sailing on a small boat.

I find that the dp0 - and indeed, the DP2 Merrill I used previously - responds very well to Antarctic light and atmospheric conditions. It excels at conveying the unreal sense of detail that you see in the landscape, where the lack of humidity and pollutants in the air allow even very distant scenes to appear crystal clear. Of course it does have drawbacks too: dynamic range is not great, and highlight clipping is generally completely irrecoverable. Highlights also clip very abruptly, which also places limitations on some types of long exposure where brighter areas can burn out in a very ugly way. Having said all that, when it works, it works like nothing else I’ve ever used.

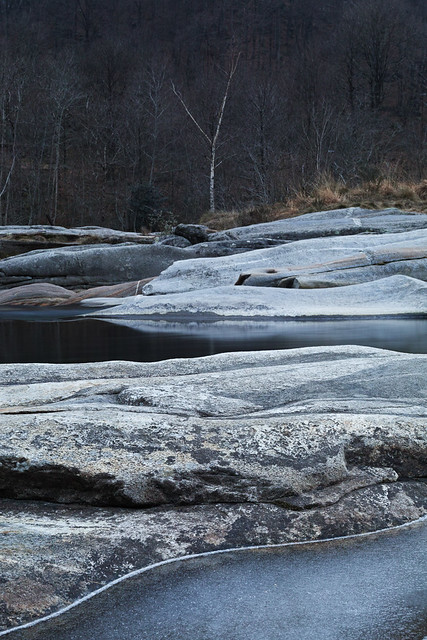
I recently published a photo diary of dp0 shots - a mix of full frame and panoramic.  Here are a few more shots which I didn’t include there.

Drm 20161202 DP0Q0544

To give some idea of the detail, the speck in the air to the left in the photo above is a helicopter. At 1:1 it looks like this:

Drm 20161202 DP0Q0544 helicopter
Drm 20161203 DP0Q0597
Drm 20161203 DP0Q0601
Drm 20200118 P0Q1001
Drm 20200120 P0Q1045 1
Drm 20200122 P0Q1083
Drm 20200123 P0Q1095
Drm 20200123 P0Q1104


Posted in Sigma on Friday, February 19, 2021 at 01:57 PM • PermalinkComments ()

Sigma sd quattro H

take it, or leave it ?

in GAS , Wednesday, June 05, 2019

A couple of months ago I finally succumbed to the temptation of buying a Sigma sd Quattro H. Ever since the camera was announced, some years ago now, it intrigued me.  As a sometimes delighted, sometimes frustrated owner of the Merrill and Quattro dp fixed-lens series, this new interchangeable lens Foveon sensor mirrorless camera seemed like something I could put to good use.  Of course, it being a Sigma, things are not as simple as they could be. The camera is indeed mirrorless, and fairly compact, but it is designed to take Sigma’s DSLR lenses. This is not totally bad news, as the recent generations of Sigma lenses have been gaining a strong reputation for Zeiss-like levels of optical performance and build quality at a quarter of the price. Unfortunately, they are not a quarter of the weight, or the bulk, and a quarter of Zeiss prices is still a lot of money.

But anyway, here I am, with a sd Quattro H body (let’s shorten that to sd-H from now on), a 35mm f1.4 Art lens, and a 24-70 f2.8 Art lens. The latter is really huge.  And now I need to be convinced all this was a good idea.

IMG 5741

The Sigma sd Quattro H with 24-70 f/2.8 lens next to the Olympus E-M1 with equivalent 12-40 f/2.8

I have used the Quattro dp0 quite extensively, mainly as a “panoramic” camera with the 21:9 ratio. That, together with previous Merrill dp2 & dp3 experience meant that I was not blind to the potential issues. In suitable conditions these cameras can be jaw-droppingly effective, but the range of conditions that can be reliable considered suitable is narrow, to put it mildly.

Although the usual claim by enthusiasts of these Foveon sensor cameras is of remarkable resolution (which they have, but let’s not go overboard), for me the killer feature is (and again, in the right conditions), a film-like delicacy of colour and colour transition. This can justify me packing the dp0 Quattro as special-use secondary camera, but the question is, are the results clear enough to justify the sd-H and 24-70 lens, four times heavier and bulkier?

Before following up on that, let’s just have a quick recap of what the sd-H offers. There’s a full, in-depth review at DPReview, so I’m not going to spend much time on technical stuff here. The body is very well built, and feels like it cost more than it did. It is comfortable to hold, despite its unconventional shape.  The controls are well laid out and easy to reach, although I would prefer the QS Quick Menu button to be in a similar position to that on the dp body. The menu is a paragon of good design - it’s a pity so few people will see it. The back of the camera has a typical Sigma quirk, with two screens side by side. The second, smaller one is used to display shooting parameters. And unlike the dp series, there is an electronic viewfinder, which is quite large and comfortable, but suffers from the difficulty of getting a high rate video stream from the Foveon sensor. Still, it is serviceable. Basically from an ergonomic point of view things are pretty good.  Oh, and there is an option to produce linear DNG output instead of X3F Raw files, which means you can open them directly in Lightroom, etc. Although I’m not sure I’d recommend that. Oh, and the autofocus can only be described as “****** hopeless”.

I have used the sd-H properly now on 4 outings. One to Venice, which didn’t go well, two quick trips to the local Valle Verzasca, and just recently a long weekend in Tuscany. It’s still all a bit inconclusive. I got some nice results in Verzasca, but I was very constrained by the lack of Depth of Field preview. Also the lack of an orientable screen or finder can be very restricting. Basically it’s not a lot fun using the sd-H on a tripod, but generally that is where it works best.

Drm 20181219 SDQH0081

this kind of detailed, softly lit scene is where the Sigma cameras do excel

Drm 20190417 SDQH0212

For my trip to Tuscany I went well prepared. The area is one I know extremely well (I even published a book about it) and there’s absolutely no stress to get the shot, because either I’ve already got it, or I’ll get it next time. I also made a DNG colour profile for the camera, and took along my MacBook Air to be able to do some on the spot verification.

So, I did some handheld shots, and some tripod shots, initially all in DNG, and imported them into Lightroom. I was pretty disappointed. For example, the clichéd shots of Tuscan poppies were just smudges, with reds either overblown to flat areas with no detail or clipped to white. Just like digital cameras 20 years ago.  A shot where the ISO crept up to 800 looked like some Chernobyl aftermath. Some shots were inexplicably soft (the 24-70 lens is stabilised, but it’s no Olympus), which I’d also noticed in Venice. And generally the resolution and sharpness was not impressive at all.

Drm 20190601 SDQH0241

Foveon colour at ISO 800. Ouch.

Oh, and the classic Foveon green flare made a unwelcome appearence.

Sdh green flare

the classic Foveon green flare

But then… when I got home, I opened the same images on my desktop computer, which has a fully calibrated Eizo monitor attached to it, and there a rather different picture emerged (literally!). The overblown reds turned out to actually hold detail. The softness in some cases turned out not to be so soft. Some of the poppy field shots turned out ok. And the photos which I took in X3F format are technically not so catastrophic. So the lesson there is that perhaps my 2011 MacBook Air is not the best tool for evaluating image quality.

Drm 20190601 SDQH0240

Foveon colour at ISO 200. A bit better.

Drm 20190601 SDQH0249

Hardly a portfolio shot, but technically this one worked ok.

Since there was quite a lot of mountain bike touring involved on this trip, I didn’t limit myself to the Sigma. I also took my Olympus E-M5ii, with my old and travel worn 14-42EZ pancake zoom. This, unlike the sd-H, could happily travel in my backpack. Oh, the shots show a somewhat alarming softness on the right bottom corner, but if you don’t look too closely, the combination actually works pretty well.  Of course, putting a “proper” lens on the Olympus narrows the gap quite a lot, making me question the sd-H even more.

When quickly reviewing photos to illustrate this post, I noticed some shots taken in previous years in Tuscany using the dp0. That camera has a smaller sensor than the sd-H (APS-C rather than APS-H), but a fixed precisely matched (and ultra wide) lens. And even as thumbnails, the shots just pop off the screen. I expected the sd-H, with Art lenses, to have the same effect, but so far, it doesn’t. I’m not quite ready to put it on eBay, but as it stands at the moment it could not justify its place in my camera bag on a real trip.  I guess we still need to work on our relationship.

Drm 20190602 SDQH0278

This is beginning to get there.


Posted in GAS | Sigma on Wednesday, June 05, 2019 at 08:20 PM • PermalinkComments (2)

A catalog for Sigma Files

Just some geeky tech stuff…

in Sigma , Saturday, June 16, 2018

As a long term user of Sigma fixed-lens cameras (I was going to say “compact” but then glanced at the dp0 Quattro on my desk) one of the most frustrating things is the difficulty with browsing photos on disk. Sigma’s Raw formats are read by very few applications, and although Quattro cameras now support DNG, which makes life easier, this comes with the drawback of not being able to use Sigma Photo Pro (SPP) for raw processing. Many would say that was a plus, but in my opinion, the combined effect of the latest version of Adobe Lightroom’s poor rendering of the DNGs, and the big step forward Sigma have taken with Photo Pro v6.6 sways the balance towards proprietary X3F files. Honestly, if you’re going to go to all the trouble involved in using a Sigma camera, it seems pretty nuts to settle for arguably sub-optimal output.

So, I needed a solution. SPP’s file browser is truly dreadful. It has no facility for marking folders as favourites, it cannot peek inside a folder to see if it has no Sigma Raw files and thus exclude it, it has no standard metadata features, etc etc. It’s a real pain.

There aren’t many alternatives: my standard tool for cataloging outside of Lightroom is MediaPro, which I use for mainly for film scans these days, but in the past I used for everything. I’ve probably been using it in various incarnations for 20 years or more. The last significant update to MediaPro was under its original owner, iView, to version 3. That was in 2004 if I remember correctly. Since then it has been owned by Microsoft, then PhaseOne, and has benefited from almost no functional development. PhaseOne’s last effort, “MediaPro SE” brought only OS compatibility (supposedly) and alignment with CaptureOne.  MediaPro SE still has quaint menu items such as “Backup to CD-ROM”. So, the chances of MediaPro supporting X3F files are in the snowstorm in hell category.

But there is one last chance: iDimager Systems PhotoSupreme (PSU). I’ve been trying to get to grips with PSU for a while. Generally I found it a very frustrating experience. PSU has a bizarre User Interface, at least for one coming to it from an application like MediaPro, or indeed Lightroom. For me Version 3 was also alarmingly unstable - you do not want an application that you invest a lot of effort into to trash it’s database too often - and at times extremely sluggish. But it could read X3F files and extract the embedded JPG. And it had a lot of other promising but infuriating features. Nevertheless MediaPro was still more elegant and intuitive, after all the years of neglect. So I set PSU aside and struggled on with SPP’s browser.

Then came PSU Version 4. I was dubious at first, the upgrade price of some $100 seemed pretty steep, and I wasn’t that optimistic. But eventually I took the plunge, and so far, it’s working out pretty well.  With PSU, I can now import X3F files, catalog them, organise them, smoothly review in anything up to full screen, and compare several files using the Light Table. What’s more, with one click I can send them directly to Sigma Photo Pro. And after I process them in SPP, I can import the TIFs into PSU and bind them with their source X3F into Version Sets (basically what Lightroom calls Stacks, only more like Aperture’s stacks, without Lightroom’s bone-headed limitations). 

Here are a few screenshots to illustrate the various steps:

Photosupreme2a

A selection of X3F thumbnails in PhotoSupreme

Photosupreme3

X3F thumbnails shown in PhotoSupreme’s Light table mode

Photosupreme5

Full size image shown in PhotoSupreme

Photosupreme2b

Sigma Photo Pro in PSU - click to open the selected image in SPP

Photosupreme1

selected image in Sigma Photo Pro

Photosupreme6

Stacked / Versioned X3F and SPP-exported TIFF in PSU

PSU Version 4 also has a reworked UI, which makes it considerably easier to get to grips with its modus operandi. It still has some rough edges though, and the developer (iDimager Systems is a one-man show, as far as I know) would do well to hire a User Experience consultant. Although to be fair probably that would not be commercially realistic. But all in all it works, and it has some very nice features, apart from the powerful Versions concept. For example, it can apply quite impressive approximate renderings to Raw files processed in Lightroom, CaptureOne and DxO PhotoLab. On the downside, it really is very inadequately documented.

But in any case, for me at least it is a really liberating experience to be able to use extensive Digital Asset Management tools on my Sigma X3F Raw files. I very much work with sets of photos, not individual shots, and the editing process (in the traditional sense) is actually more important to me than editing (in the digital photography sense). So PhotoSupreme is well worth the money, and the still fairly steep learning curve.

Posted in Sigma on Saturday, June 16, 2018 at 11:01 AM • PermalinkComments ()

Sigma DP0 Firmware 2.0

old toy becomes new toy

in Sigma , Tuesday, May 02, 2017

The recent very welcome and generous firmware update (2.0.1) for Sigma’s DP Quattro cameras has added several new dimensions to working with the output. The update brings two major new features:

  • DNG Output
  • SFD (Super Fine Definition mode)

Of the two, DNG is probably the most significant: it means that it is no longer necessary to use Sigma Photo Pro to process raw images.  They can now be opened directly in various DNG compatible applications. I’ve tried Adobe Lightroom, Photoshop, Photo Mechanic, Alien Skin Exposure, Iridient Developer. They all work fine. This is a huge boost to workflow, and opens up Sigma Quattro cameras to all those put off by having to use Sigma Photo Pro (which, by the way, is actually nowhere as awful as the internet echo chamber would have you believe).

On top of this, you can now use software such as XRite ColorChecker to create customer camera profiles to use in compatible applications.

SFD is a bit more esoteric. SFD mode combines 7 standard frames automatically shot at different exposures to obtain a single file with extended shadow and highlight detail, and lower noise. Basically an auto-HDR, but thankfully without the kitsch. Unlike, say, Olympus in-camera HDR, here all individual frames are saved as RAW and can be selected, discarded, or individually edited in Sigma Photo Pro, if you wish to go too that level of detail (no DNG here).  I’d read some pretty negative opinions of SFD from Sigma SD Quattro owners, so I was curious but not all that excited.

So, yesterday evening I went out to grab a few shows to try all this stuff out. Please note this was just a “kick the tyres” sort of thing, in a context of taking photos that I might actually be interested in, not “testing”, taking a million shots of the pot plant, brick wall, or cat nearest to the couch.

DNG output

The addition of DNG output makes a huge potential difference to workflow enhancement. The question is, what, if anything, are we losing? There are a lot of drawbacks to using Sigma Foveon cameras, but there are also two big plusses, resolution, and colour character. Compromising on either of those arguably makes using the cameras pointless. So, using a frame which is not far off a torture test, with deep shadow and bright highlights, not to mention abundant, potentially troublesome green tones, let’s dive in.

I’ve taken two identical shots, one recorded to X3F file, and the other to DNG. I have processed the X3F file in Sigma Photo Pro (SPP) using “Auto” settings - I don’t usually use Auto, but here it seemed to make sense, as I assume something similar must happen internally in-camera to create RGB data for the DNG file. I’ve opened the DNG file in Lightroom, on default settings, but changed the camera profile to Standard to match SPP. Here are the full frames, compared in Lightroom Library module.

Sd0 dng compare 1

X3F on the left, DNG on the right

Ok, you’re not going to be able to tell much from these, but the idea is to get an overall feel. The colour in the DNG file seems a little muted compared to the X3F. We’ll look at that a bit later.

The top left corner of the shot is a bit troublesome - again, we’ll look at this when discussing the SFD mode, but let’s see how X3F and DNG compare.

Dp0 compare dng tl

Top left crop, DNG version

Dp0 compare x3f tl

Top left crop, X3F version

Well, there are some minor differences, but nothing I’d personally lose sleep over. What gets interesting is looking at the potential for colour calibration.  Using the XRite Colorchecker Passport, a made a quick Lightroom profile for the SD0.

Sd0 dng colour profile

Left, custom profile, right, Sigma standard

The difference there is quite clear. I’m not yet entirely sure I prefer the custom profile version, but I think it is probably more accurate. Personally I actually like the somewhat muted saturation that the Sigma standard profile gives, but well, it’s certainly opening up a whole new dimension. It will be interesting to compare a Sigma custom profiled shot of an identical scene shot with another camera.

Lightroom actually has all the built-in SPP colour modes as profiles under calibration. I assume these come in with the DNG. If Adobe had actually put some effort into actively supporting Sigma Quattro cameras, I think we’d have heard about it.

As I said above, I’m not all that unenthusiastic about SPP, but even so, there are a lot of good arguments for using DNG, and so far, I don’t see any significant drawbacks. The out of camera DNGs are huge - about 110Mb to the 60-ish Mb of a corresponding X3F, but apparently running them through Adobe DNG converter shrinks them with no adverse side effects. I haven’t tried it yet.

SFD Mode

A couple of shots here demonstrate the usefulness of SFD mode. Unfortunately I was in a bit of a hurry, and the location I was shooting from was a bit precarious, so I wasn’t very careful about details and the non-SFD version is shot a f/4.5, so the background is not sharp.  Note that this sort of shot, where there is moving water, is not supposed to work in SFD mode.  I found it to work fairly well. The significant thing here is the highlights, in the patches of bright water. The SFD mode has yielded a lot more highlight detail.

DP0Q0671 x3i 2 full

Full scene, SFD mode

Now, two close ups of the two modes.

Drm SIGMA dp0 Quattro DP0Q0669

Close up, standard mode (auto exposure)

DP0Q0671 x3i crop

Close up, SFD mode

Note, the white balance is different in SFD mode. It was actually much cooler, but I made a rough adjustment in Photoshop. The differences in sharpness are irrelevant, as mentioned above, they are down to to wide an aperture on the non-SFD shot. However, what is significant is the extra detail in the bright water patches in the SFD shot. In the non-SFD shot they are completely blown.  Also, note, from this example, the SFD rendering of blurred water is comparable to the non-SFD. However, at the edge of the full frame, there was some minor leaf movement, and there artefacts do show up. Sometimes they will be acceptable, sometimes not. Indeed, I took a different SFD shot with moving water, and in that case some of the patterns were a bit weird.  But it looks like it could be useful, in some situations.

Note, I didn’t encounter any of the processing time nightmares broadcast on the forums. On my computer, Sigma Photo Pro 6.5.3 took under 2 minutes to process an SFD set (.XFI file). That seems reasonable to me.

A second example was aimed more at shadow detail. The full frame is below (in this case I was more interested in shadow detail).

Drm SIGMA dp0 Quattro DP0Q0658

Looking in detail at the debris in shadow in the lower left:

Drm SIGMA dp0 Quattro DP0Q0658 crop

Close up, standard mode (auto exposure)

DP0Q0659 X3i crop

Close up, SFD mode

I would say that is pretty conclusive.

However, the highlights (sky patches, top left) are blown in both cases. The sky was completely overcast, so that is fine, however the loss of detail in the foliage isn’t so impressive. Here the SFD version does a better job, but neither is brilliant. An extreme case, maybe, but also just one of the Foveon sensor’s weak points.

Drm SIGMA dp0 Quattro DP0Q0658 tr2

Close up, top left, standard mode (auto exposure)

DP0Q0659 X3i tl

Close up, top left, SFD mode

I’m not sure how much I might end up using SFD mode. I would imagine it is more generally useful for static subjects in controlled, indoor conditions, but from this very brief trial, it does seem more useful for outdoors photography than I expected. Anyway, I’m certainly not going to complain.

Thanks very much to Sigma for this update - they don’t really get a lot of publicity, but I doubt there is a company today more dedicated to making great photography equipment at reasonable prices. And they just keep improving.


Posted in Sigma on Tuesday, May 02, 2017 at 08:39 PM • PermalinkComments ()

The Digital XPan, by Sigma

Well, close enough

in Sigma , Wednesday, March 09, 2016

I bought my first Hasselblad XPan in 2000, and in the following 15+ years, I’ve accumulated a large shelf full of binders of negatives and (mainly) slides. I bought it because I liked the widescreen format, and I still do. Although a niche camera, the XPan was pretty popular, initially principally with landscape photographers, many of whom used one alongside an SLR. For me, it was the other way around - the SLR was the “second camera”. The XPan started to fade from view with the advent of DSLRs, and Hasselblad/Fuji stopped producing it in 2006, citing some story about a circuit board not being compliant with some convenient European regulations on lead content.

In recent years it has seen something of a revival, and secondhand prices for good copies have risen higher than the original retail. It seems to be riding a lot on the “back to film” movement, and the accompanying mystique. But there do not seem to be many people around who, like me, bought one back near the release date and never stopped using it.  And even fewer people who shoot slide film (still). It seems to be quite popular nowadays for “street” photography, where the unusual frame gives a novelty effect that compensates for many a shortcoming in the photograph. However, with the lenses having a maximum aperture of f/4, and rangefinder focusing, I’m not personally convinced it is that ideal for street. But I’m no authority on the matter.

For me the biggest frustration with the XPan has nothing directly to do with the camera, but with the rapidly shrinking availability of slide film.  My favourites, Kodak E100G and Fuji Velvia 100F (nothing like the infamous Velvia 50 by the way) have long since departed, Fuji Provia 400X is more or less gone, and the only serious choice left is Fuji Provia 100F, which I never much liked. The revival of Ferrania Film is, so far, inconclusive - initial batches of new film are close to a year overdue. Of course the choices in negative film are a little wider. I like Kodak Porta 400, but it only really suits brightly lit urban scenes. Kodak Ektar 100 is ghastly. And I’m a colour photographer by instinct, not black & white. On top of all of this, the bottom has fallen out of both semi-pro E6 processing, and of the semi-pro film scanner market.  So not only is the writing on the wall, but it’s on every wall in every direction.

So, there’s been a lot of calls, directed mainly at Fuji and Hasselblad, to produce a “Digital XPan”. There’s a snag there, though, because a digital sensor covering the full 65x24 XPan format - two “full frame” sensors side by side -  would be horrendously expensive, even though this seems to be what people want. So the question arises, what do we actually mean by “Digital XPan” ? What are the key features ? Would everybody agree? The answer to the last question is obviously a resounding “no”.

The key features of the XPan, technical and otherwise, are:

  • Native “panoramic” double-frame format
  • On-the-fly selectable standard 35mm frame format
  • Rangefinder manual focussing
  • TTL electronic metering
  • Offbeat, unusual camera
  • Built like a tank
  • Interchangeable lenses
  • Very high quality - and expensive - glass
  • Oh yeah… film

Personally, the key feature is the first: a camera which records what-you-see-is-what-you-get panoramic format with a dedicated panoramic viewfinder. In-camera composition is very important to my way of doing and enjoying photography, and for me cropping in Photoshop as some kind of afterthought rarely produces a strong, satisfying image. I emphasise, for me: clearly other people have different opinions. As for film, I’ll fall back again on a quote from one of my heroes of panoramic photography, Stuart Klipper, who when asked why he (still) uses film, replied “because that’s what the Linhof takes”.

So, yes, you can certainly obtain a panoramic frame from any digital camera through post-processing. Many compact cameras also have a 16:9 framing option which you can squint at while holding the camera at arms length in front of your face. But this is simply not the “XPan experience” for me. It doesn’t inspire me, and it doesn’t give me the thrill that seeing the world through the XPan rangefinder does.

And that’s a good time to introduce you to the other camera on the stage here, the Sigma DP0.

P3091492

Sigma DP0 with viewfinder, and Hasselblad XPan

I’ve been using Sigma cameras with their unique Foveon sensor since the 50mm-equivalent DP2 Merrill. As I, and many others have written, when these cameras get their ducks in a row, they are truly fabulous. The rest of the time they’re a disaster area. A while back, Sigma introduced a new lineup, using the revised Quattro sensor. They also introduced what would be politely described as an unusual body design. A lot of people were aghast at this. I thought it was fantastic. But I didn’t buy one at the time, as the DP2M & DP3M I already owned were quite enough.  But then came the announcement of the DP0 ultra wide (21mm equivalent), and buried deep down in the specification, the 21:9 framing option. It seemed that somebody in Japan was thinking along the same lines as me.

P3091494

The DP0 21:9 aspect ratio

So eventually, after a lot of indecision, I got one, along with the hood viewfinder attachment which allows eye-level composition, which as I have said is a must-have for me, and has the additional benefit of making an already strange looking device look downright weird. It’s certainly a conversation starter.

The 21:9 aspect ratio is a bit deeper than the XPan. It is about halfway between the standard 6x12 and 6x17 ratios - the XPan is slightly taller than 6x17. This is actually fine by me. I often found the XPan format a smidgen too wide, and I’ve always pined for a 612 camera. The resolution of the 21:9 DP0 image (5424 x 2324) is approximately half that of an XPan frame scanned at 4000dpi (around 12200 x 4700), but of course the two are not directly comparable. The actual information content is very similar. Of course, the DP0 has a fixed lens, whereas the XPan has three native lenses to choose from (as well as some other fairly dodgy choices via adaptor). The DP0’s 21mm equivalent lens gives a field of view roughly equivalent to the XPan 45mm lens. And they’re both f/4. And both extremely good quality lenses.

Anyway, that’s an awful lot of babble before getting on to the core of the matter: how do they actually compare ? Well, I don’t do “tests” as such, I really cannot be bothered. But recently I took the DP0 to make a few photos in the nearby Golle della Breggia, in a location I remembered shooting with the XPan a few years back.

xpan_ticino11_03_1_09.jpg

XPan, 45mm lens, Kodak E100G, scanned on Minolta Dimage Scan Multi Pro

drm__20160221_DP0Q0200.jpg

Sigma DP0, processed in Sigma Photo Pro v6.3.2

Of course, these photos are taken at different times of the year, different times of the day, and with different framing, never mind with completely different technology. The only common factor was the photographer. Given that, to my eyes at least they have a quite remarkably similar rendering of colour and tonality. The Minolta scanner, which I have now replaced, also developed a tendency to exaggerate red in the midtowns, which I clearly did not sufficiently correct here. I could certainly get the two photos to look very close in rendition with a few minutes work, but that isn’t the point: what I’m looking to decide is if the DP0 can assume the role of the XPan for me, and I’m tending to believe it can, so far.

It is also interesting to compare resolution. Here again, there is a degree of subjectivity, as the scan is not necessarily optimum, and here no sharpening has been applied (although Sigma Photo Pro allegedly always applies some sharpening). I’ve tried to match two roughly similar areas of the photos, with the DP0 crop at 1:1, and the XPan reduced more or less to match.

DP0

Sigma DP0

XPAN

XPan

So, very, very subjective, but it does look like the Sigma’s Quattro sensor is a match for 4000dpi scanned 35mm Kodak E100G. Not actually a big surprise, although it is probable that with a bit of work I could extract a little more detail from the film.

The XPan still has at least two advantages - the 30mm and 90mm lenses. But in terms of overall end to end user experience, there is a remarkable similarity between the two cameras. Indeed, it can be as time consuming to extract a processed file from Sigma Photo Pro as it is to make a good film scan…

One are where the DP0 wins outright, however, is low light photography. You can do long exposures on film, but dealing with reciprocity failure is painful, especially with slide film. The DP0, on the other hand, will cheerfully make an exposure up to 30 seconds (but no more, let’s not carried away here).  Also, I really like the way the Foveon sensors (both Merrill and Quattro) render tungsten lighting. So to wrap up here are a few shots from my first major outing with the DP0 in Venice.
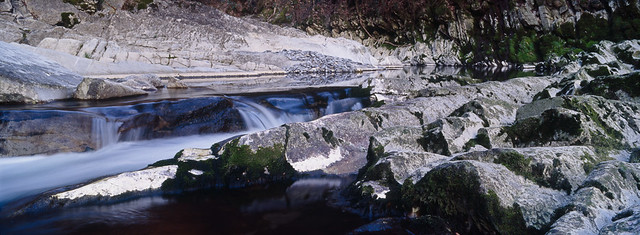
drm_20151215_DP0Q0035.jpg
drm_20151215_DP0Q0053.jpg
drm_20151215_DP0Q0034.jpg
drm_20151215_DP0Q0058.jpg

It is tempting to draw a conclusion from the fact that since I’ve owned the DP0, the XPan has sat on the shelf. But it is early days yet, and there haven’t really been many opportunities to use it recently. I certainly wasn’t going to take it to Colombia. There are also some situations in which I don’t really trust the Sigmas, in particular snow and ice.  And although the Quattro has much better battery life than the Merrill, it’s still pushing it to reach 100 shots.  Then again, processing 100 shots in Sigma Photo Pro takes roughly a decade, so perhaps it’s just as well.

But I’ll repeat what I’ve said before: the Sigma DP0, with the LCD viewfinder, set at 21:9, is the closest digital camera I’ve found so far in terms of handling and user experience to the Hasselblad XPan. And it’s a great camera in its own right, fun to use and with devastatingly high quality output.


Posted in Sigma on Wednesday, March 09, 2016 at 12:23 PM • PermalinkComments (2)
Page 1 of 2 pages  1 2 >