photoblogography - Just some stuff about photography

Negative Lab Pro

Auf Wiedersehen, Silverfast

in Film , Friday, October 16, 2020

This is a quick review of Negative Lab Pro, a piece of software I’ve been aware of for some time, but only just now got around to trying.

Upfront, the website claims “NEGATIVE LAB PRO brings impossibly good color negative conversions right into your Lightroom workflow”. And it does exactly this. And it’s a really big deal.

I’m a long term user of Silverfast, and have defended it more than once, despite its insistence on ignoring all conventions, and the total deafness of its developers and managers to any kind of feedback or dialog. Despite all this, it’s pretty good. But the workflow is stuck in the 1990s, even if some minor concessions to openness have been added. Sadly for Silverfast, I think that Negative Lab Pro (NLP) is a major nail in the coffin.

NLP provides conversions which are at least as good, provides a totally non-destructive workflow in Lightroom, enabling easy creation of multiple versions of the same source scan, all fully re-editable.  On top of this it taps into Lightroom’s Profile mechanism to enable devastatingly accurate emulations of the rendition of standard scanners such as Fuji Frontier and Noritsu.

Of course, negative conversion is a very subjective thing, but the respective look of basic Frontier and Noritsu output is quite objective.  Generally I do all my own scanning, but some time ago I did have some lab scans done, just to get a reference point. For for now I’ve just take a recent XPan shot as a test.

NLP test

The top version is Silverfast’s Kodak Portra 400 NegaFix profile at default settings.  The lower is NLP at default settings. Again, colour negative conversion is a very subjective thing, but frankly, the NLP version to me looks like what Portra 400 is supposed to look like. The greens are more natural (although the Silverfast version may just possibly be more accurate, the grass was very green), and the NLP sky is complete free of the cyan tinge given by Silverfast, the shadows are better balanced. Game over, basically.

Of course, Silverfast provides a wide range of tools to tune profiles, to make colour adjustments way beyond what Lightroom alone can do, but all of this is destructive, sits within a clunky application framework, requires multiple steps and multiple file generations, and is generally slow.  NLP also has a wide range of adjustment tools, which are easier to understand and much faster to apply, making far more fun to experiment.

I’m sold on NLP. Silverfast will now be restricted, in most cases, to Raw scanning. Of course, by generating a Raw scan, in theory I can still process it through Siverfast HDR, but it gets very fussy if any other application has so much looked at one its DNG files.

There is only one drawback (and it could be major in some cases): NLP cannot remove dust and scratches using the infrared channel.  But on balance I guess I can live with that.

Posted in Film on Friday, October 16, 2020 at 07:31 PM • PermalinkComments ()

The Atlas Athlete backpack

recommended by leading penguins

in Product reviews , Tuesday, March 17, 2020

Over the years I’ve written a fair few articles on camera bags. It’s a given that no self-respecting photographer can ever have too many bags. Well, for me the search for the as-close-to-perfect bag seems to be at an end. I’m not claiming that I have found a single bag that suits every occasion, but I have found 3 which pretty much cover everything. Two of these, I’ve had for a while: for casual, city and similar use, the Domke F803. For fully dedicated core photography, the Mindshift Backlight 26L. I’m not going to discuss those here, but rather the final piece of the puzzle, the hybrid trekking/photo Atlas Athlete backpack.

Drm 20200128 P1287296

Introducing my guest reviewer, a big fan of Atlas backpacks.

I’ve been using the Atlas backpack for almost exactly one year. It has come on several major trips (Madeira, Patagonia, Antarctica) and plenty of minor outings. There are a lot of great things about this backpack, but for me the outstanding points are the extreme comfort and the chameleon-like configurability. It is designed first and foremost as a trekking backpack. It has an aluminium frame (removable, just), and an extremely well designed harness and belt. In fact the Atlas Athlete can be ordered in several sizes and with different belt types to best suit your body measurements. And it fits like a glove.

Drm 20200128 P1287300

My guest reviewer checks out the harness

Well, so what, you might say, there are plenty of excellent trekking backpacks out there. And indeed there are, but the Atlas Athlete is also designed from a photographer’s point of view. It’s also true that there are plenty of vendors making similar claims, but where they emphasise all the gimmicks, from “packing modules” through to revolving sections, the photography aspect of the Atlas Athlete has been conceived with the same tight focus on practical usefulness as the bag itself.

IMG 6237

The Atlas Athlete with the camera compartment in expanded configuration. It holds two Olympus E-M1 bodies, one with grip, three Pro lenses, including the 40-150 f2.8 zoom, two teleconverters, and a filter pack.

The camera section is accessed through the back of the pack and is fixed in place. It has the usual velcro attached flexible dividers, which in this case are well, rather than excessively padded. The closest thing the bag has to a gimmick is the push-down/pull-up flap which reduces the size of the camera section, to about two thirds of the full size. Actually this turns out not to be a gimmick at all, but rather to be pretty useful in practice. The configuration you can see above uses the full space. For long walks I usually take a reduced amount of camera gear, so I pull the flap to make more space for other items. Even then, I can easily fit in an Olympus E-M1 body and two Pro lenses. The only slightly negative point I would make is that the compartment is a touch shallow.

Apart from the camera compartment, the Atlas Athlete has plenty of space. One of the main selling points is that it is very expandable. With the compression straps released, it expands out to 30 litres. With them tightened, it shrinks to 5 litres, and a 7 inch profile which easily fits into the overhead locker of a small commuter airliner. Uncompressed, the main space extends down the bottom of the bag, in front of the camera compartment. On the front of the camera compartment there is a concealed laptop holder, which easily accommodates my 13” MacBook Pro.  The top lid has a plethora of pockets which swallow surprising amounts of gadgetry.

You can read more about the features on the Atlas website, but the key factor, for me, is that it is supremely comfortable, even fully loaded.  Hiking long sections of narrow, humid Madeira levadas or the Torres del Paine W trail was absolutely no problem at all with this backpack. And it was equally at home fully loaded with camera gear on treks ashore in Antarctica, or rattling around on the bottom of a zodiac.  Oh, and did I mention hardwearing?

Of course, you can get trendier stuff from Peak Design and their Kickstarter imitators, if you value form over function. I’ve made that mistake so you don’t have to. Bottom line, for a hybrid trekking/photo backpack, you’d be hard pushed to find a better candidate than the Atlas Athlete.  And yes, it does come in a more stealthy colour, but the bright yellow works for me!

Guest Review Comments

Yeah, ok, it’s not the worst, but they could work on the taste a bit. Regurgitated krill would be nice!

Posted in Product reviews on Tuesday, March 17, 2020 at 04:28 PM • PermalinkComments ()

Best Cameras For Landscape Photography

it’s not what you think…

in General Rants , Tuesday, July 16, 2019

Recently the photonet has thrown up a couple of pieces aiming to list the Best Cameras For Landscape Photography. Both DP Review and Photography Life have pretty much concluded that you must have a very big and expensive digital camera to do landscape photography, and frankly, if you don’t have a $10’000 Fuji GFX100, you might as well give up. I will say that DP Review have rebalanced things a bit with a video demonstrating that you can get excellent results with a basic DSLR, but the general theme, as ever, is that for some vague reason, “landscape” photography demands huge resolution.  Leaving aside the fact that neither list includes any camera I own, which frankly doesn’t bother me, this peer pressure pushing people to buy unnecessarily complex and expensive gear makes me angry.  Gear-oriented discussion of Landscape photography comes with a number of tired, ungrounded clichés, which apart from the ridiculous and ever increasing demand for megapixels, includes equating Landscape with “wide angle”, with ultra high end lenses, and huge backpacks.

Frankly it’s all rubbish. Just a couple of years ago people were salivating over 16 megapixel cameras, and winning awards with photos taking with 35mm film.  Those ancient cameras still work, and if your photos (or indeed my photos) are no good at 16, or even 6, megapixels, they’re not going to be any better at 100. You’re just going to have a lot less money to be able to spend on travelling around to actually enjoy photography.

And speaking of travelling, airline carry-on bag dimensions and weight are constantly decreasing. If you like to have a reasonable selection of focal lengths to chose from, even “full frame” is going to become troublesome.  There’s not much point in having that super mega camera or that super bright telephoto lens if you can’t afford to travel with them.

Of course sometimes the biggest and best is justified, but either because somebody else is paying, or because you’re wealthy.  And even then, the difference in outcome is often not much more than size.  Take Julian Calverly for example: while he does a lot of commercial work with a medium format system - where he actually needs tilt shift lenses - he also produces equally fabulous work using an iPhone.

Far be it for me to lay down the law, but I’m just passing on my experience - I spent too many years in the gear acquisition hamster wheel, and frankly it has bought me very little lasting pleasure. If I look at my favourite photos, there is no correlation whatsoever with the perceived quality of whatever camera I was using. Actually most of the few photos I have which have received external praise, and even generated income, were taken using a 5Mpix camera.  A camera which just happened to have excellent ergonomics.

And that’s the key really - the best camera for your landscape photography is the one you feel the most comfortable with, which will get out of the way and allow you to concentrate on the photography. The so-called “image quality” is close to irrelevant, as pretty much all cameras today are well past good enough.  And what differences there are are far from linear - a $10’000 Fuji GFX does not have image quality 10 times greater than a $800 Fuji X-T30. In fact in many cases you’d have to look very closely to see any difference.

My advice is simple - keep the weight down, and buy something digital with weather sealing. The rest will take care of itself.

Posted in General Rants on Tuesday, July 16, 2019 at 08:13 PM • PermalinkComments ()

The Hasselblad XPan - a very long term review

better late than never

in Hasselblad XPan , Tuesday, September 11, 2018

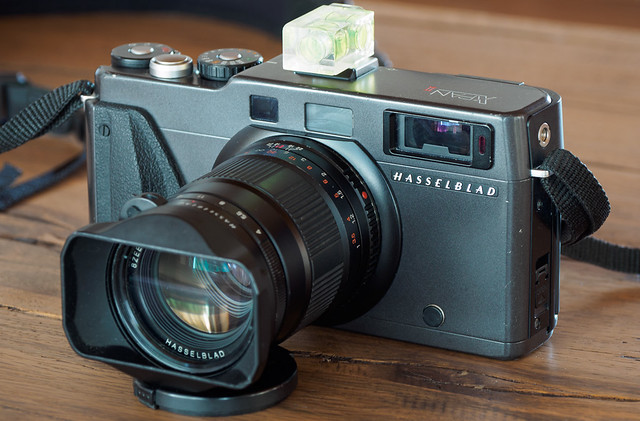
I acquired my first Hasselblad XPan in the spring of 2000. So maybe it’s about time to write a few words about it.

Drm 20180818 EM580047

My interest in so-called panoramic photography began in the mid-1990s, when I was professionally involved in the emerging multimedia world. In particular I adopted very early versions of Apple’s QuickTime VR technology to generate immersive walkthroughs of various scenes. As time was generally limited, initially I used an Apple QuickTake 200 camera to generate content (640Kpx images, approximately 30 per set of 4 very expensive lithium AA batteries), then experimented with Polaroid instant slide film. At some point I realised that it could be interesting to unwrap the 360 QTVR files to create widescreen stills. I used these in creating a couple of CD sleeves, which was a sideline of mine at the time, and in personal work. So when the Hasselblad XPan appeared on the scene in late 1998, I was fully primed.

Xpan ir2001 02

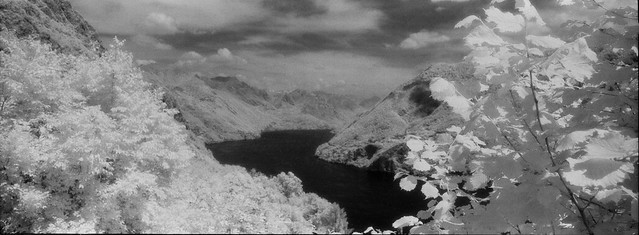
2000: Lago di Lugano, infrared.

It was another year or so before I could actually afford it, but by then end of 2000 I had the camera and all three lenses, and took them with me on a 5 week trek around New Zealand - which later turned out to be the spiritual home of the XPan 😊.

The same kit travelled with me to Canada and the USA, to Spain, Iceland, Ireland, Greece and Italy, before finally setting off on a tour of Svalbard by yacht in 2010. A couple of days into the trip, when distracted from photography by a storm, I inadvertently left the camera in the inflatable dinghy lashed to the deck. Several hours later it was discovered submerged in a puddle of salt water. And that was game over for XPan number one.

Xpan nz rs10 006

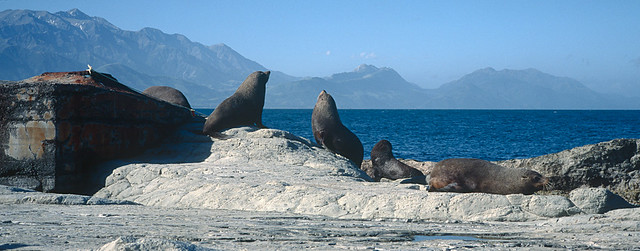
2001: New Zealand

There was no way I was going to be without an XPan though, and I was lucky to find an unused XPan II for a reasonable price, in fact under $1’000 once I traded in my little used Fuji GS670. Fortunately this was before XPan prices passed ‘stupid’ level and reached ‘absurd’. The XPan II carried on where it’s predecessor left off, and has visited Iceland, Norway, Patagonia, Antarctica and various places around Europe. It had a bit of a rest in 2016, where it got a bit eclipsed by my Linhof 612 obsession, but this year it has regained favour.

So, that was a long intro, but it shows that I should be in a position to write a long term user review of both versions of the XPan.

Snhg ref 55

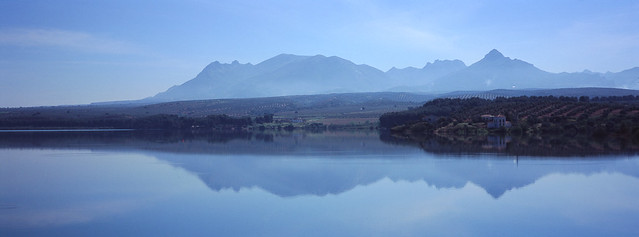
2002: Andalucia

Xpan ch2003 10 01

2003: Switzerland

First though let’s clear up a few things. The camera was fully designed and built by Fujifilm in Japan. For some reason Fuji felt that it was not commercially viable under their name alone, so they sought an international marketing partner. Reportedly it was first offered to Leica, who turned it down: just as well, otherwise the red dot tax would have made it unaffordable. Hasselblad said yes, and turned it into a marketing success. Far fewer people know what a “Fuji TX-1” is than recognise “Hasselblad XPan”. It is said that the lens designs were specified and quality controlled by Hasselblad, but this seems hard to believe. Fuji was, and remains, a top tier lens designer and manufacturer. Hasselblad has never built a lens in-house. In any case, Hasselblad XPans were delivered with quality control certificates from both Fuji and Hasselblad, and all of the system components were stamped “Made in Japan”. Possibly the TX cameras did not come with the esoteric and little used Hasselblad tripod plate. In any case, it was a successful partnership, which was later extended with the H-1 camera and lenses.

Xpan iceland25 04

2004: Iceland

Basic specifications are very well known, but let’s summarise them anyway. The XPan is a coupled rangefinder camera with a large, clear finder with framelines for 45mm and 90mm lenses. The body is made of aluminium with a magnesium skin, which is a bit prone to scuffing and paint flaking (it doesn’t matter). It has a fully electronic metal shutter with controlled speeds from (remarkably) 8 seconds to 1/1000th. Using the bulb setting exposures up to 30 seconds (early XPan I), 270 seconds (later and updated XPan I) or 540 seconds (XPan II) can be made. Note though that since the shutter is electronic, holding it open for long exposures is bad news for the batteries. It has an LCD panel on the back which displays exposure info, and provides access to several settings. On the top plate there is a small LCD panel which shows remaing frames and the mode (panoramic or normal). So far this applies to both version I and version II, but from now on there is some divergence.

Xpan eolie 210509 7

2005: Vulcano

A criticism of the XPan I was that did not show exposure information in the viewfinder. The only display was a set of LEDs showing under- or over-exposure. A particular complaint I had is that it did not show any indication that exposure compensation was set. This was fully addressed in the XPan II, but a high price was paid. Both versions support DX-encoding for setting ISO, but on the XPan I, a lockable dial on the front panel allows this to be over-ridden manually. A dial on the top plate, integrated with the on-off-mode switch, allows up to 2 stops of exposure compensation to be set. The XPan II loses all of this. The front dial disappears altogether, and the top plate loses the exposure compensation dial. It all looks rather bare - all that remains, apart from the exposure dial, is the switch with off, single shot, continuous shot (1 frame per second) and timer positions. The exposure compensation and ISO have to be set using the LCD panel and its very fiddly buttons, and this is really no fun even in good conditions. In the cold it is a nightmare. In exchange, you get a very clear film speed display in the viewfinder. And an extra $1000 or so on used prices. The only other difference is that the XPan II supports a custom electronic cable release, if you can find one. But you can also use a standard threaded mechanical cable, so, whatever.

Toscana06 12

2006: Tuscany

The exposure dial includes the setting for aperture priority. I have always found the upper-biased, center-weighted metering to be very accurate, and therefore aperture priority works well. Note that the metering seems to be biased towards landscape photography with slide film. With negative film it may be a good idea to dial in an extra stop, or to compensate using the ISO setting. The meter reads down to the 4EV, which I’ve always found to be a little restricting - a little more sensitivity would have been nice, especially given the up to 8 sec timed shutter release.

Xpan ticino01 08

2007: Switzerland

Returning to the back panel, there is a recessed button to rewind the film before it reaches the end, and a backlight to illuminate both LCDs. Settings include a rewind mode which leaves the film leader out, which is very useful for those doing their own development, or for changing film mid-roll (if you remember the frame count you can reload it and advance over exposed frames in manual mode with the lens cap on). Note, the very first batch of XPan Is, with long shutter speed restricted to 30 seconds, had an issue with fogging infrared film. The Xpan II was advertised as fixing this issue, but in fact the later batches of XPan Is did not show it either. Personally I only used IR film in the XPan in 2000-2001. I don’t remember getting any good shots, but I never had any issues with fogging.

Ice0803 sunlit mountain2

2008: Iceland

The XPan is very pleasant to handle. It is well balanced with all three lenses, and the shutter button has just the right half/full pressure resistance. The viewfinder is gorgeous and the rangefinder patch easy to see, although as often as not I preset focussing at hyperlocal distances. I’ve always had the impression that the 30mm viewfinder is polarised, but I guess at that angle of view it can’t be. Nevertheless, the world actually looks better through the 30mm viewfinder than in real life! The body viewfinder framelines change with lens, with mode /standard, panoramic), and adjust for parallax. The 30mm viewfinder is fixed, but it has frameline notches to indicate the standard frame size. The XPan II handling is slightly improved by the viewfinder display, but with the already discussed tradeoffs. The lens focus rings are silky smooth and nicely weighted, and the aperture rings are firm and precise. However only full stop steps are possible. Generally the XPan is a real “feel good” camera to use. It can get a bit heavy if you carry it around all day with a full set of lenses, it is solid metal after all, but nothing too dramatic.
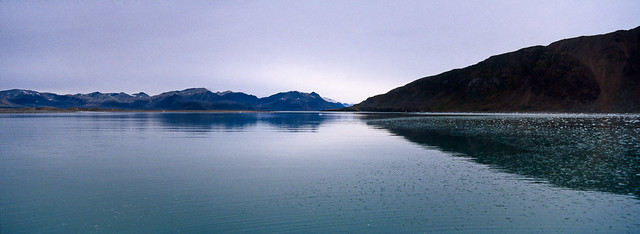
Krossfjorden

2010: Svalbard

Many XPan owners have a preference for a particular lens, usually the 45mm or 30mm. I’m more equal opportunities - I find all 3 lenses to be excellent, and of the three I actually prefer the 90mm for landscape use, although I’ll admit that for street it is less adapted. I’ve owned two copies of the 30mm lens, and both have come down with so-called “Schneideritis” even though it is not a Schneider lens. Possibly there is a related Fujinonitis strain. My first one was replaced (somewhat reluctantly) by Hasselblad for this very reason. The replacement soon came down with the same symptoms. However, there is absolutely no impact on the optical behaviour of the lens, and it doesn’t seem too be contagious, so I just ignore it. Another blight to strike the 30mm lens, or rather its viewfinder, is the bubble level drying up. This is annoying, but it seems quite common. I have contacted the French Hasselblad specialists “Les Victor” about a repair, apparently they can fix it at a reasonable price.

Stromboli

2011: Stromboli

One of the first issues to hit XPan users is of course, how to actually deal with the output. In the early days, Hasselblad (I suppose) promoted the format to a network of labs which could print the panoramic format, and supplied sheets of special stickers in the camera box which could be fixed to the film canisters to indicate to the lab that they contained XPan frames. I know I had my first XPan roll lab printed, probably by Jessops pro shop in Oxford Street, London, where I bought it, and probably on the day I bought it. But from then on, pretty much it has been the hybrid route for me: lab developing, home scanning, home printing. I don’t think I’ve ever shot a roll of traditional black and white film in the XPan, only colour negative, colour positive and Scala. Maybe a few rolls of Polaroid instant film too.

Xpan breggia051212 006

2012: Switzerland

To start with, scanning XPan film at home was tricky. Unless you were basically a millionaire, there were no film scanners that could take anything other than standard 35mm frames, and flatbed scanners outside of the unattainable Linotype-Hell or Scitex were hopeless. So initially, using a Microtek 4000 scanner, I painstakingly scanned each frame in two halves, and merged them in Photoshop. Even with a high end Mac, this was tedious. So the barriers to entry were actually pretty high, and the XPan was very much considered a professional’s camera. Gradually things got easier. Just about affordable Medium Format desktop scanners emergec from companies such as Polaroid, Microtek, Nikon and Minolta, several of which specifically handled 35mm panoramic format, and I eventually settled on a Minolta MultiScan Pro which lasted me over 10 years. When after these years of service it started getting troublesome, I finally replaced it with a Plustek Opticfilm 120, which has been efficiently devouring both XPan and medium format film ever since. I thoroughly recommend this scanner, by the way.
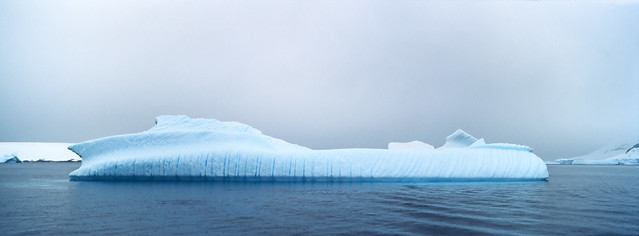
Xpan antarctica06 06

2013: Antarctica

It’s been a long journey with this camera, and although the current valuation (based on eBay) sometimes makes be think of selling it and using the proceeds to buy a small island, I’m not done with it yet. After all, I’m still waiting for my rolls of Film Ferrania slide film, not to mention new Ektachrome, to put through it. As an aside, Ektachrome 100G was the film that really made the XPan sing for me. At present I have to use Provia 100F, not a great hardship, but back in the days when there was choice, it wasn’t always the film I reached for.

Xpan sardegna1409 02 09

2014: Sardinia

Xpan norway1506 2 07

2015: Norway

So, should you buy an XPan today? Frankly, at eBay prices, no. It’s not worth it. The camera has crossed the border from “working tool” to “sought-after collectible”. Get a Fuji GSW690 and crop. Or use a digital camera with suitable framing, such as the Sigma dp0 (my candidate for the “digital XPan”). So far, fingers crossed, unlike several other electronic film cameras, the XPan is not displaying any chronic failures that I know of, but they will come, and it will not be repairable. So paying crazy money like $6000 - $7000 for a so-called pristine model on eBay is very unadvisable in my opinion, not to mention well over $1000 for a non-working body. In particular the markup on XPan II bodies is absolutely not justified from any photographic point of view.

If you do find one which is more realistically priced because it isn’t collector-pristine, bear in mind that any XPan body actually used for photography will inevitably acquire scuff marks and paint chips, and this is not an indication of over-heavy use. Although note, the extreme beaters you sometimes see on eBay do surprise me. My camera is not mollycoddled at all, so to get it in the beaten up condition of some I’ve seen must take real dedication. Having said that, I do remember in 2004 seen an XPan belonging to US landscape photographer Steve Kossack practically stripped of paint, so I guess it is feasible.

Xpan variochrome2 06

2017: Switzerland

Up to a few years ago you could still buy good used models with a warranty through reputable second hand dealers, but that supply seems to have dried up. Who is going to trade in their camera to a dealer for maybe $1000 when $3000 on eBay is now considered “cheap”?

Passion

2018: Calabria

The XPan has acquired mythological status. Personally, to a great extent, it defines me as a photographer, but that’s because of circumstances. I happened to be in the right place at the right time, with adequate cash, to get in at the ground floor. But it is only a camera. Today, there are other paths to follow, and plenty of other ways to pursue “widescreen” photography. If you happen to come across an XPan in fair condition with no bits missing for under $2000, then go for it. Otherwise, be sure you know what you’re getting into!

Drm 20180818 EM580048

More of my XPan photography:

More XPan reading:

Posted in Hasselblad XPan on Tuesday, September 11, 2018 at 06:08 PM • PermalinkComments ()

SRDx Photoshop plugin

A short review of Silverfast’s spinoff

in Product reviews , Friday, July 20, 2018

SRDx is a Photoshop plug-in promising to be “new standard for
Dust and Scratch Removal”. It is fact derived from the SRDx feature included in the Silverfast scanning application produced by Lasersoft AG. As a plug-in SRDx is being marketed separately through its dedicated website.

Srdx

Silverfast also offers iSRD for scanners which include infrared channel output. This provides an effective way to remove the majority of dust and scratches from scans (although the patching itself is not perfect). But for some film types, in particular black & white negatives and Kodachrome, this doesn’t work. SRDx uses some form of contrast detection coupled with a proprietary algorithm to detect dark or light defects. Back in The Old Days (i.e last century) there were a number of such Dust and Scratch removal plug-ins, in particular one from Polaroid. They didn’t work very well, and neither did (or does) Photoshops’s own filter, which is a very blunt tool. However, Photoshops current manual healing tools are very good, so what can SRDx offer ?

Well, in a word, automation. SRDx is actually fast, flexible and effective. I have a large hoard of Kodachrome slides, and every few years or so I try once again to revive some of them.  Many years ago I stored them very carelessly (I had no idea at the time) and they have been infected by fungus and are often very dusty. Sadly SRDx can’t do a lot about the fungus - although in some cases it has helped - but it can make short work of other imperfections.

Here’s an example. The first image is of a complete Kodachrome scan opened in the SRDx plug-in in Photoshop. It presents a simple, clear User Interface.

Srd full

SRDx automatically detects imperfections, and marks them (by default) in red. It has several tools for manual adjustment, including a brush for marking undetected defects, and iteratively strengthening the effect, an eraser for zapping false detection, a mask tool for adjusting area for consideration. The automatic detection can be fine-tuned using the detection intensity and tile size sliders. Settings can also be saved as presets.  So, it is simple, but quite comprehensive. The view can be switched between Original / Mark / Optimised. An example at 100% is shown below:

Screen Shot 2018 07 20 at 11 56 22
Srd mark

Srd correct

As mentioned, SRDx is also available within Silverfast & Silverfast HDR, but there I find it a lot less useful. Since Silverfast works with by default previews, for SRDx to work you first need to make an “HQ Preview”, which is Silverfast Marketingspeak for a full scan. You then have to wait while it applies all its processing, which for a medium format high resolution scan can take forever. In such a scenario SRDx is an exercise in frustration and essentially useless. It isn’t that much better in Silverfast HDR. On the other hand, in Photoshop, it is very fast. Finally the patching is also better in the plug-in version.

The masking took is useful but it would appear that despite the fact that you can name the mask (in Silverfast you have to), in fact you can only have one mask. Also, for some reason, in the Windows version masking is not included. This would be a major issuer are if I was a Windows user.

In conclusion then: 15 or 20 years ago this would have been a no-brainer. Lasersoft AG have taking SRDx out of its constraining environment in Silverfast and given it a new role. This enables a much faster workflow. If, like me, you have a lot of non-Infrared compatible film to scan and clean, SRDx is a considerable timesaver and recommended. At least the Mac version. At €49 it is reasonably priced, much more so than the initial €99 which was ambitious even by Lasersoft’s standards. For Windows, due to the mask issue, personally I would not recommend it. From time to time Lasersoft offer special pricing - I had an offer last year at €20 which I missed out on. At that price I’d say go for it, on both platforms.

SRDx doesn’t work miracles but it is pretty good - better than I expected in fact - and if you have a need for it, it is worth the price. Unfortunately for Lasersoft, I suspect the market is small, and getting smaller. But I wish them good luck with this initiative.

Posted in Product reviews on Friday, July 20, 2018 at 12:39 PM • PermalinkComments ()

Page 2 of 4 pages  < 1 2 3 4 >